Hardware options for your in-gallery experience

This post attempts to summarize the many conversations we’ve had with you all over recent weeks on hardware options for displaying your Curio interactive in your gallery (or even outdoors!).

There are many options for touchscreens and mounts, and I’m certainly not endorsing any particular avenue - these are just some of the things we have had experience with, or that our other Curio clients are using.

Using an iPad as a touchscreen

This is a popular option mostly because the iPad comes with a built in computer and touchscreen all in one and as such; it’s a cheaper option. (Although, the screen size is limited to 12.9 inch max - if you want a screen size better suited to two or more people looking together, then scroll on.)

Once you have your iPad you download the Curio player onto it, and then you’ll need to mount the iPad into some kind of stand to secure it, and to prevent visitors fiddling with the controls, turning it off or clicking the home screen in an attempt to quit the program.

Mounts can be floor standing or even wall mounted. One of our customers has used these ones below to clip the iPad onto a display case, where it provides the interpretation of the objects in the case:

These wall mounted options have come from Bouncepad.

These wall mounted options have come from Bouncepad.

These floor standing options (the left hand one showing a branding panel that could be added) have come from Armodilo.

These floor standing options (the left hand one showing a branding panel that could be added) have come from Armodilo.

If you’ve ever met us at any of the Museum conferences we love to hang out at, then you will have seen the right hand stand in action (it can fix to the floor) and an example of the left hand model, featuring a Curio interactive in an art gallery context, can be seen here.

Once you have your iPad ready to go live, you’ll need to turn on guided access (kind of setting a kiosk mode for it) to take the final step in locking the iPad down, so no-one can break out of any software you’re running on it. There’s a useful TIP on how to do this here.

So, there’s a few off-the-shelf ways to get an iPad into a gallery space.

Using a regular old touchscreen (and a computer)

When we are recommending hardware a lot depends on the situation the screen will be in; what it is displaying and; what we want to achieve. However, there’s a lot to be said for ELO open frame touchscreens (though we also LOVE Planar touchscreens for outstanding quality). The open frame screens don’t look so pretty, like a regular TV/monitor, instead they come with bolt holes ready to mount to a surface. The image below shows you an open frame screen that has been mounted into a beautiful carved wooden frame.

fenton agreement.jpg

You can also mount a touchscreen into complete custom made units, such as for these tables that allow you to explore historic documents in detail at the He Tohu exhibition:

doctable3.jpg

The thing is that you do need to mount a screen into something - even just to hide the control buttons that would otherwise be accessible to the public. If they are exposed, visitors WILL fiddle with them.

To drive the touchscreen, we’re likely to recommend small form factor computers, that can be easily housed within an exhibition space and deliver incredible performance. They can include Intel NUCs as an example. You really want a computer with a 2.8Ghz processor + and don’t be tempted to save money by buying a laptop style CPU (which tries to save power); instead go for a multimedia/gaming style which is always on and ready to deliver interactivity.

The great outdoors

We’ve also been looking into touchscreens that work in an outdoor setting. We saw a pretty impressive TV screen in the Daintree rainforest recently which made us realise that outdoor screens have come a long way in the last few years.

These weather proof touchscreens from STX are ones we have investigated recently:

Again these water and weather proof touchscreens deliver superb quality and can be mounted in a variety of ways. (They also come with a choice of surrounds and look quite sharp in black.)

If you need any help deciding what to use, what size to go for, etc then drop us a note. Our hardware expert has been installing hardware in museums for 25 years - he knows a thing or two; and we’re always happy to help.

Setting up an iPad as an in-gallery touchscreen

An iPad can be a great device for a public-facing interactive like Curio. The form factor is small and light, and there are many “tamper proof” secure enclosures available off the shelf.

As with any touchscreen, you need to make sure that the public can’t  break out of your application, and Apple have made some tools for exactly that. The trouble is, it’s not all that intuitive, so our hardware expert, Rex McIntosh, explains how to set your iPad up for success:

  1. First, you want the iPad to stay awake, so ensure the power adaptor is always plugged in.

  2. Next, enable the auto-lock so the screen never goes to screensaver/black. Do this by going to Settings, Display & Brightness, Auto-Lock, and select Never.

  3. That’s the basics handled, now you want to lock the iPad down, so users can’t access the power button, or swipe up from the bottom and open other applications. It’s known as “Guided Access”. (Note: this has changed in the latest version of iOS 12.1.1 which has caused frustration for existing users of IPads - if that’s you - read on, help is at hand.)

  4. To do that go to: Settings, General, Accessibility. Scroll to the bottom to find “Learning, Guided Access”. Turn on “Guided Access”

  5. Next, you need to create a Passcode, so you can stop Guided Access if you need to do anything to the iPad. Go into Passcode settings and input a PIN.

  6. Next, turn on “Accessibility Shortcut” so that triple clicking the home button will enable and disable the lock-out. (This lets you break out of Guided Access mode, and you’ll be asked for your Passcode - again so if visitors did happen to triple click the home button, they’d need a Passcode to break out of the Curio application).

  7. Then, here’s the real trick to ensure the screen really doesn’t go into screensaver mode - from within the Guided Access setting, turn on “Mirror Display Auto Lock” this ensures the lock time you set earlier also applies when the iPad is in the “Guided Access” mode.

  8. Last step - promise - now run your Curio software (the interactive you’ve made) and click the Ipad *home button three times (quickly). That will bring up a prompt offering you the choice to START Guided Access. Do that, and you’ll be locked (literally) and loaded. Later, when you want to quit the interactive - repeat this step and turn the Guided Access back off again to exit Curio.

    *Note - if you’re on a newer Ipad pro without a home button, then press the power (sleep/wake) button three times instead.

If you have issues - do make contact with us, we have a LOT of experience with in-gallery technology!

Emily standing next to our demonstration iPad, in a stand, at the Alliance of American Museums awards night - did we mention Curio won SILVER??

Emily standing next to our demonstration iPad, in a stand, at the Alliance of American Museums awards night - did we mention Curio won SILVER??

Collaborating with your colleagues

A great feature of Curio is that you can invite colleagues to join your account. That means you can:

  • work on a project together - imagine getting someone to add the translations direct into the software; or add the image caption text in for you? (Think of the email trails you’ll save!)

  • share the analytics so others can see how the interactive is being used, and even compare performance between similar interactives.

  • create a customised “theme” which sets the onscreen elements such as text or buttons, in terms of their colours, layout, size and shape. You can name that theme and then it is available for anyone else in your organisation to use. This could be a theme set to match a specific exhibition design, for example, and you could even ask the exhibition designer to join the account and set those styles for you. (There’s more on customising the look of your interactive here. )

inviting someone to join your organisation

To invite someone to join your organisation, simply go to your Account/Organisation and there you will see a unique combination code. They can then go to the Sign Up page, create an account, and click “Join an existing organisation” where they can enter your unique organisation code:

org code.png

If you need to remove someone - we can manage that for you. We’re here to help you, every step of the way.

Accessibility - how to reach all your audiences.

Accessibility is a key priority for museums everywhere as we all strive to be inclusive for everyone visiting the museum. Curio is designed to make it super easy to reach a variety of audiences and I’d like to share some tips on how you can do that.

Audio descriptions for sight impairment.

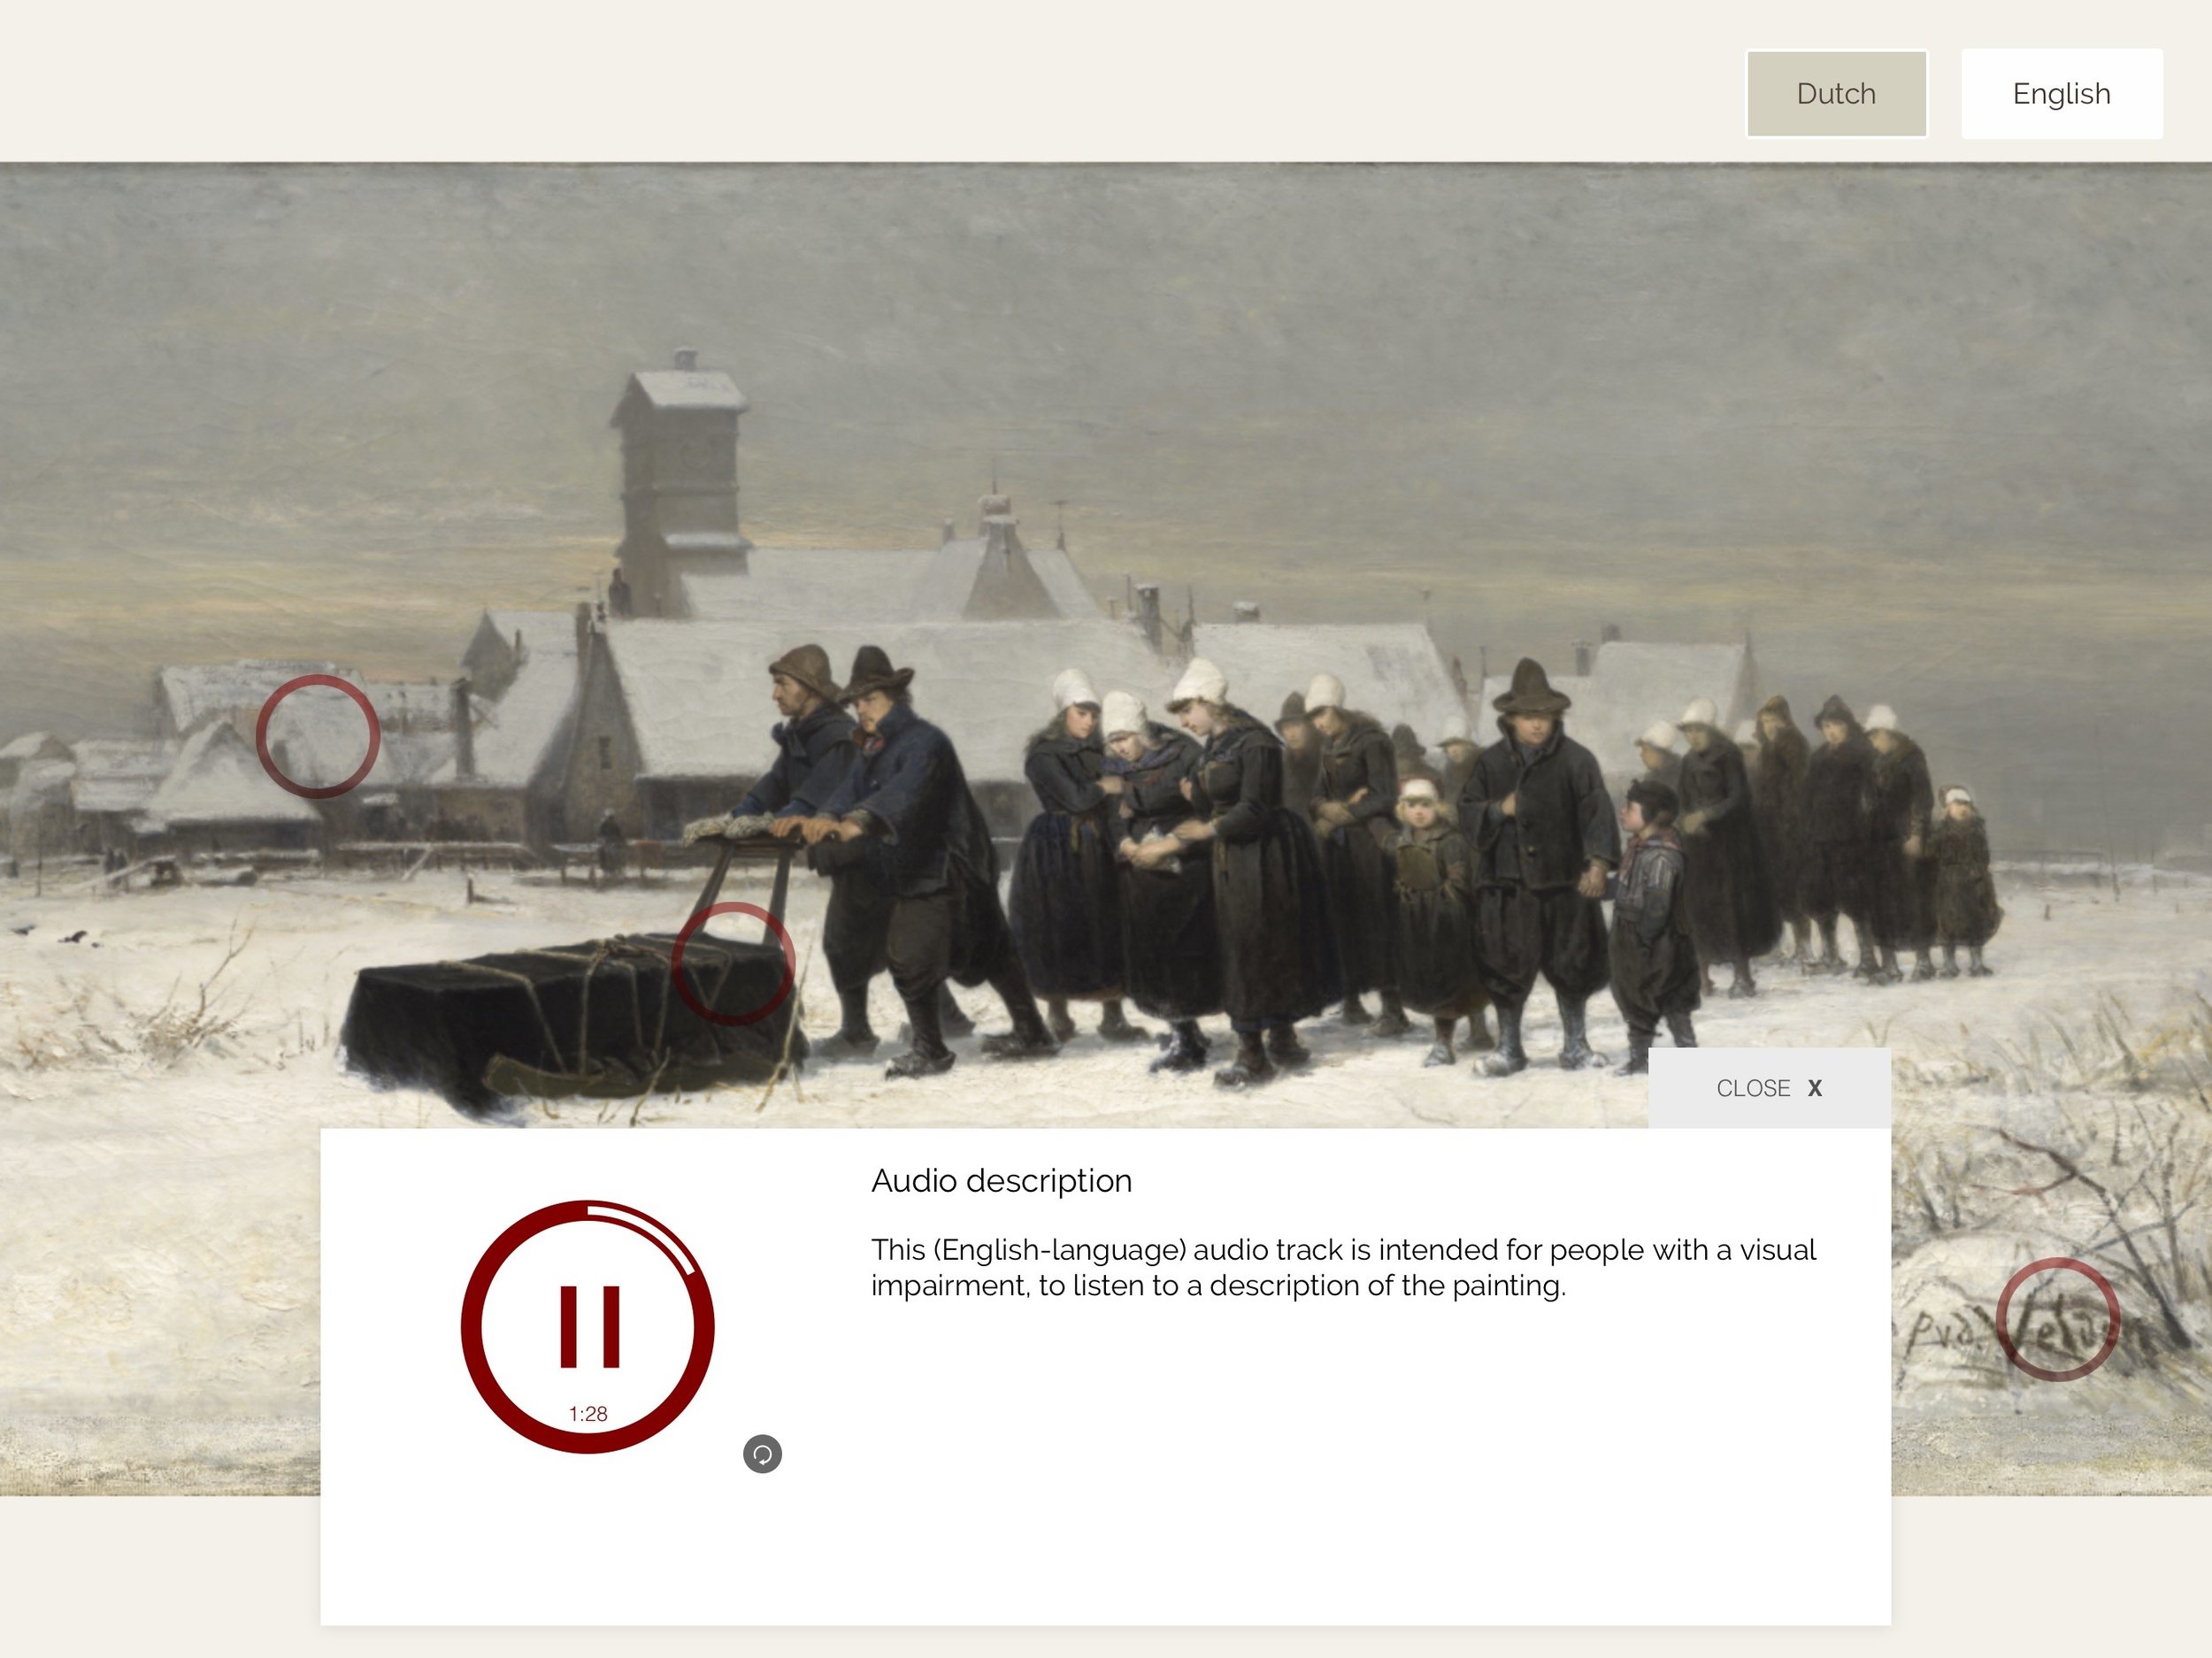
First, let’s think about those with impaired sight, or even total blindness. Adding an audio track where you describe the object in detail allows those visitors to “see it” by listening.

audio description for blind.jpg

In this case we’ve done this by using the “Overview” button, and adding an audio track to that. The track can then be selected and played for visitors. The description covers things we may take for granted like the size of the object, it’s mood, colours and story, as well as its physical attributes.

Including sign language

There are a few ways that you can include sign language using Curio. In New Zealand it is an official language that we simply don’t see enough of. You would need to shoot the video and we have a lot of experience and can help you with advice and contacts. (Contact us for any help at all.)

First, you can add sign language videos into any highlight by uploading them as you would a normal video.

add sign language.jpg

Secondly, you use the language function to add another language. Having done that you can name the language by editing its display name. This could then display a language button (e.g. “a Deaf perspective”) and all the content on each highlight could be told from that perspective. It means sign language videos could be included as an alternative for this “language” and audio tracks could be replaced with sign or text alternatives.

(This can easily apply to a number of specialist audiences; the example below is content catering for younger children)

9fc19bb5-25d0-400c-abdd-336014518c0e.png

adding subtitles to video

Another way to make video content accessible for those who can’t hear is to add subtitles.

video subtitles.jpg

To do that you add your subtitle file (.vtt) as you would for, say, a You Tube video, when you upload your video.

It’s worth remembering that subtitles aren’t always the easiest way to “watch” a video as reading at the pace of someone talking can assume excellent language and reading skills, plus you can miss much of the imagery when you’re busy reading.

Keep text legible

Another thing to think about is ensuring your on screen text is easy for everyone to see. Curio has a fabulous customise tool to let you select colours, fonts, sizes and background colours. As you do all that though, our advice is to publish the interactive to the actual screen you will be using, to test how it looks.

font sizes.jpg

One of the most important things to consider is keeping a really good contrast between the background colour and the font colour.

When you think you’ve got it right - ask a variety of your visitors for feedback. Check in-situ too, to check for legibility in the light conditions of the actual space it will go in, as well as the actual screen size.

Consider the physical ergonomics, as well

Finally, take a look at the height and position of your touchscreen. Try using it yourself by sitting in a chair, and imagine you don't have great use of your upper body - how is reaching for those buttons? Where are the speakers positioned? Is there glare on the screen?

When you think you've got it right, check in with your community and invite them to test it for you. 

useful links


There are many great resources out there to assist you with things like:

put yourself in their shoes

To truly embrace accessibility, the very best things you can do are:

  • think - imagine your experience from another perspective; how would someone with different physical capabilities experience it?

  • listen - start conversations with those in your community who can give you first hand feedback.

  • watch (& learn) - observe different people encountering your space and experiences, and note what works and what doesn't.

Keeping our minds, hearts and eyes open can simply be the best thing we can do to be truly inclusive.